NetworkedBlog
Showing posts with label Black Widow Creationz Kits. Show all posts
Showing posts with label Black Widow Creationz Kits. Show all posts
Friday, December 12, 2014
 FB Timeline Epliepsy Awareness Set


Today I will be using Black Widow Creationz Epliepsy Awareness kit.
I will also use a D/S on some items. Please place to your liking.
I will use C/P for Copy/Paste.
Open a 600 x 600 transparent canvas & a 850 x 315 transparent canvas.
I will be working with both canvases at the same time for all elements.
Using your magic wand, C/P into selection BWC_EpilepsyAwareness_PP3.
C/P BWC_EpliepsyAwareness_EL4 & resize 60%.
C/P BWC_EpliepsyAwareness_EL15 & resize 60%.
C/P BWC_EpliepsyAwareness_EL14 & resize 40%.
C/P BWC_EpliepsyAwareness_EL6 & resize 60%.
I am using the following settings for the WordArt and Copyright.
Font for Copyright: Arial
Size: 8
Stroke: 1.0
Foreground: #46243a
Background: #a3cbcc
Font for WordArt & Tag Name: Magneto
Size: 22
Stroke: 2.0
Forground: #46243a
Background: #a3cbcc
Thank you so much for taking a look at my tutorial.
If you want to try it, I'd love to see your results.
Please send it to: agelesskarmacreations@gmail.com.
Happy PSPing!
Saturday, February 2, 2013
BWC PTU Kit - Goddess Of Love

I am using the PTU kit called Goddess Of Love by Black Widow Creationz.
Click Goddess Of Love to purchase.
I am using the matching tube called Goddess Of Love by Keith Garvey.
The mask I am using is Monti Jagged Heart Mask by Monti's Pixel Playground.
I will be using C/P for Copy & Paste.
Also, please use my tag as a reference as to where to place elements.
Open a 600 x 600 transparent canvas.
C/P BWC_GoddessOfLove_PP2
At this step I applied my Mask.
C/P BWC_GoddessOfLove_EL28 & resize 50%.
C/P BWC_GoddessOfLove_EL31 & resize 50%.
C/P BWC_GoddessOfLove_EL16
C/P BWC_GoddessOfLove_EL1& resize 30%.
C/P BWC_GoddessOfLove_EL29 & resize 60%.
C/P BWC_GoddessOfLove_EL12 & resize 60%.
C/P BWC_GoddessOfLove_EL30 & resize 50%.
C/P BWC_GoddessOfLove_EL36 & resize 80%.
C/P BWC_GoddessOfLove_EL37 & resize 80%.
C/P BWC_GoddessOfLove_EL32 & resize 40%.
At this time, please add the proper copyright. Please make sure you have a license to use the artwork.
Font for Copyright & Watermark: Arial
Font Size: 11
Font Style: Bold
Font Stroke: 1.0
Foreground: 250, 249, 247
Background: Black
Font for Tag Name: Love Letters
Font Size: 72
Font Stroke: 2.0
Foreground: 74, 54, 55
Background: 138, 48, 70
I'd love to see your results of this tutorial. Please send them to agelesskarmacretions@yahoo.com.
Tuesday, January 1, 2013
Beautiful Princess

I am using the beautiful Jersey Princess PTU kit by Black Widow Creationz. The tube I am using is by Gary Rudisill called Jersey Princess. You can get BOTH exclusively at SATC.
The mask I am using is Vix_Mask02 by Vix.
Open a 600 x 600 transparent canvas.
C/P BWC_JerseyPrincess_PP8
Now you can add the mask.
Layers, New Mask Layer, From Image.
From the drop down menu choose Vix_Mask02 & click OK.
C/P BWC_JerseyPrincess_EL6 & resize 70%.
C/P the Jersey Princess tube & resize 50%.
C/P BWC_JerseyPrincess_EL18 & resize 25%.
Using your Magic Wand, Click inside the frame.
Selections, Modify, Expand by 3.
Make a duplicate of your Jersey Princess tube & close the original.
Mirror the tube layer.
C/P the Jersey Princess tube & resize to 40%.
C/P BWC_JerseyPrincess_EL13 & resize 35%.
C/P BWC_JerseyPrincess_EL4 & resize 30%.
C/P BWC_JerseyPrincess_EL5 & resize 35%.
C/P BWC_JerseyPrincess_EL26 & resize 35%.
C/P BWC_JerseyPrincess_EL21 & Mirror.
C/P BWC_JerseyPrincess_EL20 & resize 25%.
C/P BWC_JerseyPrincess_EL3 & resize 40%.
C/P BWC_JerseyPrincess_EL35 & resize 30% & Free Rotate 45 Degrees..
C/P BWC_JerseyPrincess_EL34 & resize 30% & Free Rotate 45 Degrees.
C/P BWC_JerseyPrincess_EL32 & resize 30%.
C/P BWC_JerseyPrincess_EL33 & resize 50%.
Font for the Copyright, I used the layer that came with the tube.
Font used for Tag Name & Watermark:
Channel
Foreground: 249, 127, 199
Background: Black
Font Style: Bold
Font Stroke: 2.0
Font Size: 40
Add a drop shadow to your Tag Name Layer.
I'd love to see your results of this tutorial. Please send them to agelesskarmacreations@yahoo.com.
Thursday, December 27, 2012
Black Widow Creationz Sugar Fairies PTU Kit
I am using Black Widow Creationz PTU kit called Sugar Fairies. Please click the link to get it.
Also, use my tag as a reference as to where to place elements.
I will be using C/P for Copy/Paste.
Open a 600 x 600 transparent canvas.
C/P BWC_SugarFairies_EL33 & resize 60%.
Using your Magic Wand, Click inside the frame.
Selections, Modify, Expand by 6.
C/P BWC_SugarFairies_EL14 & resize 80%.
Selections, Invert, Delete on Keyboard.
Selections, Select None.
C/P BWC_SugarFairies_EL38 & resize 40%. Duplicate & Mirror.
C/P BWC_SugarFairies_EL8 & resize 40%.
C/P BWC_SugarFairies_EL34 & drag down right above your background layer.
C/P BWC_SugarFairies_EL31 & drag down right above EL34.
I will now add 3 flowers. I will also drag these down, but they will be above the two layers I just added.
C/P BWC_SugarFairies_EL11 & resize 60%.
C/P BWC_SugarFairies_EL12 & resize 60%.
The next 4 Elements will be resize to 40% & placed at the bottom of the frame to your liking.
C/P BWC_SugarFairies_EL2, EL3, EL4 & EL5
C/P BWC_SugarFairies_EL1 & resize 40% & mirror. These two should be on the outside of the other candies.
At this time, you can choose your font of choice. For the Tag name, I am using Fairydustb. You can get it at Dafont.
I am using the font Arial for the Copyright & Watermark.
The colors I am using for the fonts are as follows:
Foreground: 223, 158, 196
Background: 106, 60, 35
Font Style: Bold
Size for Tag Name: 72
Stroke: 2.0
I'd love to see your results of this tutorial. Please send them to agelesskarmacreations@yahoo.com.
Saturday, December 1, 2012
Winter Wonderland

I am using the creative work of Black Widow Creationz. This is her PTU kit called Ms Victoria Winter. You can only get it at SATC.
I am using the artwork of Alexander McMillan & this tube is called Victoria.
I am also using Vix_ChristmasMask5 by VIXPSP.
I will use C/P for Copy & Paste. Also, please use my tag as a reference as to where to place elements.
I also added drop shadows to some elements. You may add them where you want.
Open a 600 x 600 transparent canvas.
C/P BWC_MsVictoriaWinter_PP10
Apply your mask of choice by doing the following:
Layers, New Mask Layer, From Image & select your mask in the drop down box. Click OK.
C/P BWC_MsVictoriaWinter_PP9
C/P your tube of choice.
C/P BWC_MsVictoriaWinter_EL9 & resize 70%
C/P BWC_MsVictoriaWinter_EL13 & resize 30%.
C/P BWC_MsVictoriaWinter_EL4 & resize 50%.
C/P BWC_MsVictoriaWinter_EL14 & resize 20%.
C/P BWC_MsVictoriaWinter_EL21 & resize 40%.
C/P BWC_MsVictoriaWinter_EL24 & resize 30%.
C/P BWC_MsVictoriaWinter_EL34 & resize 60%.
C/P BWC_MsVictoriaWinter_EL19 & resize 30%.
C/P BWC_MsVictoriaWinter_EL8 & resize 30%.
C/P BWC_MsVictoriaWinter_EL38
Drag this element to the bottom right before the last layer so it can be seen under mask layer.
Font: Christmas/Flakes
Font Colors:
Foreground: 254-251-243
Background: Black
Don't forget the Copyright & your Watermark.
I'd love to see your results of this tutorial. Please send them to agelesskarmacreations@yahoo.com.
Friday, November 23, 2012
Waiting For Santa

I am using the beautiful PTU kit by Black Widow Creationz called Miss Santa. You can purchase it at Scraps And The City.
The mask I am using is DBV Xmas Mask 15. Don't forget to leave some love when you download.
The tube I am using is the wonderful artwork of Keith Garvey. This tube is called For Santa. You need a license to use his work. You may purchase a license at the website.
To start off:
Open 600 x 600 transparent canvas
C/P BWC_MissSanta_PP6
At this time apply your mask.
Layers, New Mask Layer, From Image & Select your mask from the drop down menu & click OK.
C/P BWC_MissSanta_EL2 & resize 20%.
C/P BWC_MissSanta_EL29 & resize 30%.
C/P BWC_MissSanta_EL39 & resize 30%.
C/P BWC_MissSanta_EL27 & resize 65%.
C/P BWC_MissSanta_EL24 & resize 30%.
C/P BWC_MissSanta_EL17 & resize 40%.
C/P BWC_MissSanta_EL19 & resize 50%.
I so added an inner bevel on the next two elements. The selections are as follows:
Effects, 3D Effects, Inner Bevel
Width: 8
Smoothness: 10
Depth: 4
Ambience: 0
Shininess: 20
Angle: 315
Intensity: 30
Elevation: 60
C/P BWC_MissSanta_EL18 & resize 40%.
C/P BWC_MissSanta_EL40 & resize 30%.
C/P BWC_MissSanta_EL1 & resize 20%.
For the tag name, I used: Santas Sleigh Full font. You can download it for free at Dafont.com.
Font Colors:
Foreground: Black
Background: 208, 2, 2
I'd love to see the results from this tut. Please send them to agelesskarmacreations@yahoo.com.
Sunday, November 11, 2012
Time to Fly

I am using the FTU kit called Free Spirit by Black Widow Creationz.
The tube I am using is by Anne Stokes called Immortal Flight. It can be found on her Deviant Art website.
I will use C/P for Copy/Paste.
Please use my tag as a reference as to where to place elements.
Open a 600 x 600 transparent canvas.
C/P Frame1 & resize 70%.
Using your magic wand, click inside each frame & Selections, Modify, & Expand by 6.
With each Expansion of the frames C/P your tube to your liking. Selections, Invert & Delete on Keyboard.
C/P Rose1, Rose2 & Rose3 & resize 60%.
C/P Dragonfly2 & resize 40%.
C/P Dragonfly1 & resize 40%.
C/P HeartKeyChain, Mirror & resize 30%.
C/P HeartKeyChain2, & resize 30%.
C/P ButterFly1 & ButterFly2 & resize 40%.
C/P Sparkle & Sparkle2.
Don't forget to add the Copyright & your Watermark.
I used the font Arial for both.
The font for the Tag Name is: Falling in Love
The Colors I used are as follows:
Foreground: 72-46-76
Background: 45-56-176
I would love to see your results of my tutorial. Please send them to agelesskarmacreations@yahoo.com.
Sunday, October 21, 2012
Sins of the Heart

The PTU kit I am using is by Black Widow Creationz & is called 7 Deadly Sins.
Please use my tag as a reference as to where to place elements.
I will use C/P for Copy/Paste.
Also, add a drop shadow to every element.
Also, add a drop shadow to every element.
Open a 600 x 600 Transparent canvas.
C/P Element 18
C/P medi_parisian love2 & resize 80%.
C/P Element12 & resize 60%.
C/P Element10 & resize 40%.
C/P Element16 & resize 45%.
C/P Element20 & resize 80%.
C/P Element16 & resize 60%.
C/P Element17 & resize 50%. Duplicate & place to your liking.
C/P Element30 & resize 70%.
C/P Element29 & resize 70%.
C/P Element27 & resize 60%.
C/P Element28 & resize 60%.
C/P Element8 & resize 40%.
C/P Element9 & resize 40%.
Here, you can add the Copyrights & your Watermark.
Font: Arial
Foreground: Paper9
Background: Paper6
Tag Name Info:
Font: MC Sweetie Hearts
Foreground: Paper6
Background: Paper9
I'd love to see your results of this tutorial. Please send them to agelesskarmacreations@yahoo.com.
Monday, October 15, 2012
Look At Me

I am using the artwork of Keith Garvey. This tube is called Merlot. You have to have a license to use his work. You can obtain a license at his website.
The kit I am using is a PTU kit by Black Widow Creationz called Dark Princess.
During this tutorial, I will use C/P for Copy/Paste.
Please use my tag as a reference as to where to place elements.
First I opened a 600 x 600 transparent canvas.
C/P BWC_DarkPrincess_EL32 & resize 60%.
Using your Magic Wand, click inside the frame.
Selections, Modify, Expand by 6.
C/P your close up tube & resize 60%. Place to your liking.
Selections, Invert & Delete on keyboard.
At this time, I will make a duplicate of the other layer of the tube.
I closed the original tube.
With the duplicate tube layers, I have chosen the layer that is not close up & I have mirrored it.
C/P as a New Layer & resize to 90%. Place to your liking.
C/P BWC_DarkPrincess_EL31 & drag this layer to the very bottom.
Click back on your top layer.
C/P BWC_DarkPrincess_EL7 & resize 40%.
C/P BWC_DarkPrincess_EL16 & resize 40%.
C/P BWC_DarkPrincess_EL1 & resize 30%.
C/P BWC_DarkPrincess_EL2 & resize 30%.
C/P BWC_DarkPrincess_EL34, Duplicate & Flip.
Drag layer to very bottom & place to your liking.
Click back on your top layer.
C/P BWC_DarkPrincess_EL22 & resize 50%.
C/P BWC_DarkPrincess_EL24 & resize 55%.
C/P BWC_DarkPrincess_EL40
C/P BWC_DarkPrincess_EL17 & resize 30%
C/P BWC_DarkPrincess_EL18 & resize 40%.
Make sure your full tube is your VERY top layer.
For the Tag Name, I used the following:
Font: Pristina
Foreground: Black
Background: BWC_DarkPrincess_PP9
Stroke: 2.0
Font Style: Bold
Don't forget to add the proper Copyright & your Watermark.
I'd love to see your results, please email them to agelesskarmacreations@yahoo.com.
Sunday, October 7, 2012
Kitty Party

I am using the artwork of Keith Garvey. The tube is called Bad Kitty You can purchase it & also get a license to use his work at the link above.
The FTU kit I am using is called Halloween Party & is by Black Widow Creationz & it is part of a blog train. Click the link to download.
You will also need WSL_Mask306 by Weescotlass Creations. Click the link & it will take you to the blog. Look for the link on the right hand side of the screen for WSL_Masks301 - 360.
I will use C/P for Copy/Paste. Please use my tag as a reference as to where to place elements.
Open a 600 x 600 transparent canvas.
First C/P BWC_HalloweenPartyBT_PP5 & then apply your mask.
Layers, New Mask Layer, From Image. Select your mask from the drop down menu & click ok.
C/P BWC_HalloweenPartyBT_EL19 & resize to 50%.
C/P your tube of choice.
If you are using the Bad Kitty tube, resize her to 43% & position her to your liking.
C/P BWC_HalloweenPartyBT_EL15 & resize to 20%.
C/P BWC_HalloweenPartyBT_EL11 & resize to 30%.
C/P BWC_HalloweenPartyBT_EL14 & resize to 30%.
C/P BWC_HalloweenPartyBT_EL12 & resize to 30%.
C/P BWC_HalloweenPartyBT_EL16 & resize to 30%.
C/P BWC_HalloweenPartyBT_EL3 & resize to 25%.
C/P BWC_HalloweenPartyBT_EL4 & resize to 30%.
C/P BWC_HalloweenPartyBT_EL2 & resize to 25%.
For the font, I will use one of the other papers.
Font: Halloween Bats
Foreground: BWC_HalloweenPartyBT_PP1
Background: BWC_HalloweenPartyBT_PP5
Stroke: 2.0
Font Size: 55
Font Style: Bold
Don't forget to add the Copyright & your Watermark
Font for Copyright & Watermark: Arial
Foreground: Black
Background: BWC_HalloweenPartyBT_PP4
Stroke: 1.0
Font Size: 12
Font Style: Bold
I'd love to see your results, please send them to agelesskarmacreations@yahoo.com.
Tuesday, September 25, 2012
Spider Girl

I am using the awesome PTU kit of called Black Widow Creationz called Black Widow.
C/P Element 22 & resize 65%.
C/P BlackWidow02 & resize 25%.
Using your Magic Wand, click inside the left frame.
Selections, Modify & Expand by 5.
C/P BlackWidow01 & resize 20%.
Selections, Invert & Delete on keyboard.
Selections, Select None.
Again, using your Magic Wand, click inside the middle frame.
Selections, Modify & Expand by 5.
C/P BlackWidow03 & resize 35%.
Selections, Invert & Delete on keyboard.
Selections, Select None.
Let's use our Magic Wand one more time.
Click inside the right frame.
Selections, Modify & Expand by 5.
C/P BlackWidow04 & resize 35%.
Selections, Invert & Delete on keyboard.
Selections, Select None.
C/P Element5 & resize 40%.
C/P Element6 & resize 50%.
C/P Element28 & resize 45%.
C/P Element25 & resize 60%.
C/P Element20 & resize 45%.
At this time, you can add the Copyright & your Watermark.
I am using Arial for the Copyright & Watermark.
Colors:
Foreground: 26, 30, 45
Background: White
The font I am using for the tag name is called Halloween Spider & you can get it at Dafont.com.
Colors:
Foreground: 26, 30, 45
Background: 130, 4, 5
I'd love to see your results of this tutorial. Please send them to: agelesskarmacreations@yahoo.com.
Friday, July 20, 2012
Lil Emo FTU Collab Kit

I am using the FTU Collab of Black Widow Creationz called Opening Collab Free.
Please use my tag as a reference.
I will be using C/P for Copy/Paste.
C/P BWC_SPU_OpeningCollab_EL17 & resize 60%.
Using your Magic Wand, click inside the frame.
Selections, Modify & Expand by 6.
C/P BWC_SPU_OpeningCollab_EL3 & position to your liking inside the frame.
Pull EL3 down below the frame.
C/P BWC_SPU_OpeningCollab_EL6 & resize 20%.
C/P BWC_SPU_OpeningCollab_EL1 & resize 30%.
Free Rotate EL1 to the Left 30 degrees.
Duplicate & Mirror EL1
C/P BWC_SPU_OpeningCollab_EL14 & resize 30%.
C/P BWC_SPU_OpeningCollab_EL9 & resize 20%.
C/P BWC_SPU_OpeningCollab_EL2 & resize 20%.
C/P BWC_SPU_OpeningCollab_EL16 & resize 20%.
C/P BWC_SPU_OpeningCollab_EL13 & resize 20%.
Duplicate & position to your liking.
C/P BWC_SPU_OpeningCollab_EL15 & resize20%.
Duplicate & position to your liking.
C/P BWC_SPU_OpeningCollab_EL3 & resize 50%.
Don't forget to add the Copyright & your Watermark.
For the font for the Copyright, Watermark & the Tag Name:
Font: Emophonic
Foreground: 19-2-18
Foreground: 19-2-18
Background: BWC_SPU_OpeningCollab_pp1
Stroke: 2.0
Font Style: Bold
I'd love to see your work, please send your results to: agelesskarmacreations@yahoo.com.
Wednesday, July 18, 2012
In Love Forever

I am using the PTU kit of Black Widow Creationz & it is called Death By Chocolate.
I am also using the mask called Vix_Mask445 by Vix PSP.
I will use C/P for Copy/Paste.
Please use my tag as reference as to where to place elements.
C/P sm_melaineVD4_5
C/P heart2 & resize 40%.
Duplicate & place to your liking.
C/P heart1 & resize 25%.
C/P SweetHeartCandy1 & resize 40%.
Duplicate & place to your liking.
C/P ChocolateCandy1 & resize 40%.
C/P HeartCandle1 & resize 50%.
C/P ChocolateBar1 & resize 30%.
C/P Lolipop1 & resize 40%.
Duplicate & place to your liking.
C/P Lolipop2 & resize 40%.
Duplicate & place to your liking.
C/P SweetHeartCandy2 & resize 40%.
C/P SweetHeartCandy3 & resize 40%.
Select your background layer & add your mask.
I used Paper17 for my background.
Don't forget to add the Copyright & your Watermark.
I used Arial for that font.
For the Tag Font:
I used Chocolate Dealer
Font Style: Bold
Stroke: 2.0
Foreground: Black
Background: 135-2-11
I'd love to see your results, please email them to agelesskarmacreations@yahoo.com.
Friday, July 13, 2012
Bubbly

I am using the PTU kit of Black Widow Creationz called Mojitos.
I am using the artwork of Keith Garvey. It is from his Color Series 2 collection & is called Yellow Color Series Tube.
I will use C/P for Copy/Paste
Please use my tag as reference as to where to place elements.
C/P BWC_Mojotios_EL5 & Duplicate twice.
C/P BWC_Mojotios_EL12 & place in center.
C/P BWC_Mojotios_EL21 & Duplicate twice.
C/P BWC_Mojotios_EL40 & resize 60%.
C/P BWC_Mojotios_EL9 & resize 60%.
Using your Magic Wand, C/P your tube of choice inside the frames.
C/P BWC_Mojotios_EL3 & resize 40%.
C/P BWC_Mojotios_EL31 & resize 40%.
C/P BWC_Mojotios_EL8 & resize 35%.
C/P BWC_Mojotios_EL28 & resize 40%.
C/P BWC_Mojotios_EL4 & resize 40%.
Don't forget to add the copyright & your watermark. I used the font Arial for them.
For the Tag Name, I used the following:
Font: Cocktail Bubbly from dafont.com
Foreground: 78-157-6
Background: 248-218-81
Stroke: 2.0
Font Style: Bold
Font Size: 90 - 120 (depending on size of name)
I'd love to see your results of my tutorial. Please send them to agelesskarmacreations@yahoo.com.
Sunday, July 8, 2012
Beach Fun

I am using the PTU kit called Sea Shells by Black Widow Creationz.
I am also using the work of Keith Garvey. The tube is called Color Series Pink & it is part of the Color Series 2. You must have a license to use his work.
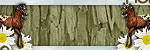
For the mask, I am using HorsePlay Pasture Mask 20 by Bev Herr.
Please use my tag as a reference as to where to place elements.
Also, I will use C/P for Copy/Paste.
You will need a working knowledge of PSP.
I started off opening a 600 x 600 transparent canvas.
C/P BWC_SeaShells_EL34 & resize 70%.
Using your Magic Wand, click inside your frame.
Selections, Modify & Expand by 5.
C/P your tube of choice inside your frame.
If you are using the same tube as I am, use the close-up & resize 80%.
Position to your liking.
Selections, Invert, Delete on keyboard.
Selections, Select None.
From here, I closed off my background layer & merged the other two layers. Then open up your background layer.
From here, I selected my background layer C/P BWC_SeaShells_PP7.
From here add your mask of choice.
After you have added your mask, merge the group together.
Select your top layer.
Next, I used the other Color Series Pink tube. I mirrored her so she is facing the other direction & resize 80%.
C/P BWC_SeaShells_EL2 & resize 30%.
C/P BWC_SeaShells_EL10 & resize 50%.
C/P BWC_SeaShells_EL16 & resize 30%.
C/P BWC_SeaShells_EL17 & resize 50%. Duplicate twice & place along bottom of canvas.
Click on your top layer.
C/P BWC_SeaShells_EL4 then resize 40%.
C/P BWC_SeaShells_EL21 & resize 40%.
C/P BWC_SeaShells_EL15 & resize 30%.
C/P BWC_SeaShells_EL1 & resize 30%.
C/P BWC_SeaShells_EL28 & resize 50%.
C/P BWC_SeaShells_EL35 & resize 50%.
C/P BWC_SeaShells_EL33 & resize 60%.
Font Tag Name: Harrington
Font Style: Bold
Stroke: 3.0
Colors for Tag Name:
Foreground: 87-124-110
Background: 254-138-168
Colors for Tag Name:
Foreground: 87-124-110
Background: 254-138-168
Don't forget to add the Copyright & your Watermark. I used the Arial font.
I'd love to see your results of this tutorial, please send them to agelesskarmacreations@yahoo.com.
Tuesday, July 3, 2012
Falling For You

The PTU kit I am using is called Fallen by Black Widow Creationz. You can purchase it at her store here.
I will use C/P for Copy/Paste.
To start off, open a 600 x 600 transparent canvas.
C/P Fame2 & resize 70%.
Using your magic wand, click inside each frame.
Selections, Modify, Expand by 5.
C/P your tubes of choice inside each frame.
I used, sm_victress1_5, sm_victress1_3 & sm_victress1_4 in that order, left to right from the kit.
C/P Corset2 & resize 60%.
Duplicate & place duplicate where you would like.
C/P Bottle1 & resize 60%.
C/P Boot1 & resize 30%.
C/P Flowers3 & resize 30%.
C/P Hearts1 & resize 50% & Duplicate 3 times.
C/P Wire1 & resize 80%.
Now you can add the copyright & your watermark. I used the font Arial.
For the tag name, I used the font Mistress.
Stroke: 2.0
Style: Bold
Foreground: 199-199-199
Background: Black
I hope I get to see your results. Please send them to agelesskarmacreations@live.com.
Sunday, July 1, 2012
America 2012

I am using part of a Blog Train kit called Stars and Stripes by Black Widow Creationz.
I am also using the amazing artwork of Keith Garvey. You must have a license to use his work. His work & the license can be purchased at PTE.
You will need a working knowledge of PaintShop Pro to do this tutorial. I will use C/P for Copy/Paste.
C/P BWC_StarsStripes_EL11 & resize 70%.
Using your magic wand, place your tube inside & delete what is not inside the frame.
C/P BWC_StarsStripes_EL10.
C/P BWC_StarsStripes_EL20 & resize 40%.
C/P BWC_StarsStripes_EL7 & resize 50%.
C/P BWC_StarsStripes_EL1 & resize 40%.
C/P BWC_StarsStripes_EL9 & resize 40%.
C/P BWC_StarsStrips_EL15 & resize 40%.
C/P BWC_StarsStrips_EL16 & resize 50%.
C/P BWC_StarsStrips_EL3 & resize 40%.
C/P BWC_StarsStripes_EL24 & resize 50%.
From here add the artist copyright & your watermark.
Font: USA Flag for tag name
Arial for Copyright & Watermark
Foreground: 140-0-0
Background: 0-0-110
I'd love to see your results of my tutorial. Please send them to agelesskarmacreations@yahoo.com.
Up Above All

I am using the artwork of Nene Thomas called Moon Amethyst.
I received this tube from a forum that I was a member of. I'm not sure if I needed a number to use this tube. If anyone knows, please let me know so I can correct the tag.
I received this tube from a forum that I was a member of. I'm not sure if I needed a number to use this tube. If anyone knows, please let me know so I can correct the tag.
The PTU kit I am using is called Jars of Hearts by Black Widow Creationz.
To start off we need a 600 x 600 transparent canvas.
Also, I will use the following:
C/P = Copy/Paste
C/P BWC_JarsofHearts_EL1 & place in upper left hand corner of canvas.
C/P BWC_JarsofHearts_EL11 & place in upper left hand corner.
C/P BWC_JarsofHearts_EL13 & place in upper right hand corner.
C/P BWC_JarsofHearts_EL8 & resize 50%.
C/P BWC_JarsofHearts_EL7 & resize 50%.
C/P BWC_JarsofHearts_EL17 & resize 30%.
C/P BWC_JarsofHearts_EL28 & resize 30%.
C/P BWC_JarsofHearts_EL30 & resize 30%.
C/P BWC_JarsofHearts_EL34 & resize 30%.
The font used: Pixie Moon, also used a drop shadow on the name.
Stroke: 2.0
Style: Bold
Foreground: Black
Background: 99-23-124
Don't forget to add Nene Thomas's copyright & your watermark.
I'd love to see your results! Please send them to agelesskarmacreations@yahoo.com.
Sunday, June 24, 2012
Boricua Soy Yo

The tags I make from this tutorial will for sure go to my Family.
The PTU kit I am using is from Black Widow Creationz & it's called Boricua 4 Eva.
The tube I am using is from Keith Garvey & is called Bratz. You can purchase it at PTE.
I will use C/P for Copy/Paste.
Please use my tag as a reference as to where to place elements.
First, open a 600 x 600 transparent canvas.
C/P BWC_Boricua4eva_EL37 & resize 50%. Place element where you'd like. I placed mine on the top right.
Using your magic wand, click inside the star.
Selections, Modify & Expand by 5.
C/P tube of choice. I am using Keith Garvey's Bratz tube (closeup). Resize to 30% & paste into the star.
Selections, Invert, Delete on keyboard.
Selections, Select None.
C/P tube at bottom of canvas.
C/P BWC_Boricua4eva_EL7 & resize 30%.
C/P BWC_Boricua4eva_EL12 & resize 30%.
C/P BWC_Boricua4eva_EL11 & resize 30%.
C/P BWC_Boricua4eva_EL17 & resize 60%.
C/P BWC_Boricua4eva_EL40 & resize 90%. Also, lets drag this layer just above the background layer.
Staying on that layer, C/P BWC_Boricua4eva_EL41, Mirror & resize 90%.
Now going back up to your Raster layer 8, select it.
C/P BWC_Borica4eva_EL20 & resize 50%.
C/P BWC_Boricua4eva_EL57 & resize 30%.
C/P Brad1 & resize 50%.
Don't forget to add your copyright & watermark.
Font: Arial
Stroke: 2.0
Style: Bold
For the tag phrase & tag name:
Font: Kaligraf Latin
Stroke: 2.0
Style: Bold
Foreground: 59-46-131
Background: 162-46-50
For the Tag Phrase, please flip the colors around. To me, the Phrase showed up better.
I'd love to see your results, please email them to agelesskarmacreations@yahoo.com.
Subscribe to:
Comments (Atom)
Copyrighted
My Blinkie

I Gladly CT for:

Member Of the Following


CU Licenses


Places I Love to Visit